
DIY Bench Tutorial!

As we approach the holidays, we generally like to slow down on DIY’s before we get into full Christmas mode around here… BUT in true Arnal fashion, we built a bench in a weekend and it turned out fantastic!! (We just HAD to squeeze in one more project).

After we painted our main floor, we changed up the layout of our living room and it felt instantly more open and we really enjoyed the sight lines of our fireplace. But it also felt a little bare right in front of the fireplace, so the search for a low wide bench commenced! And we searched every website, found a couple we liked but weren’t in love with, none were the right size and most were out of our budget...
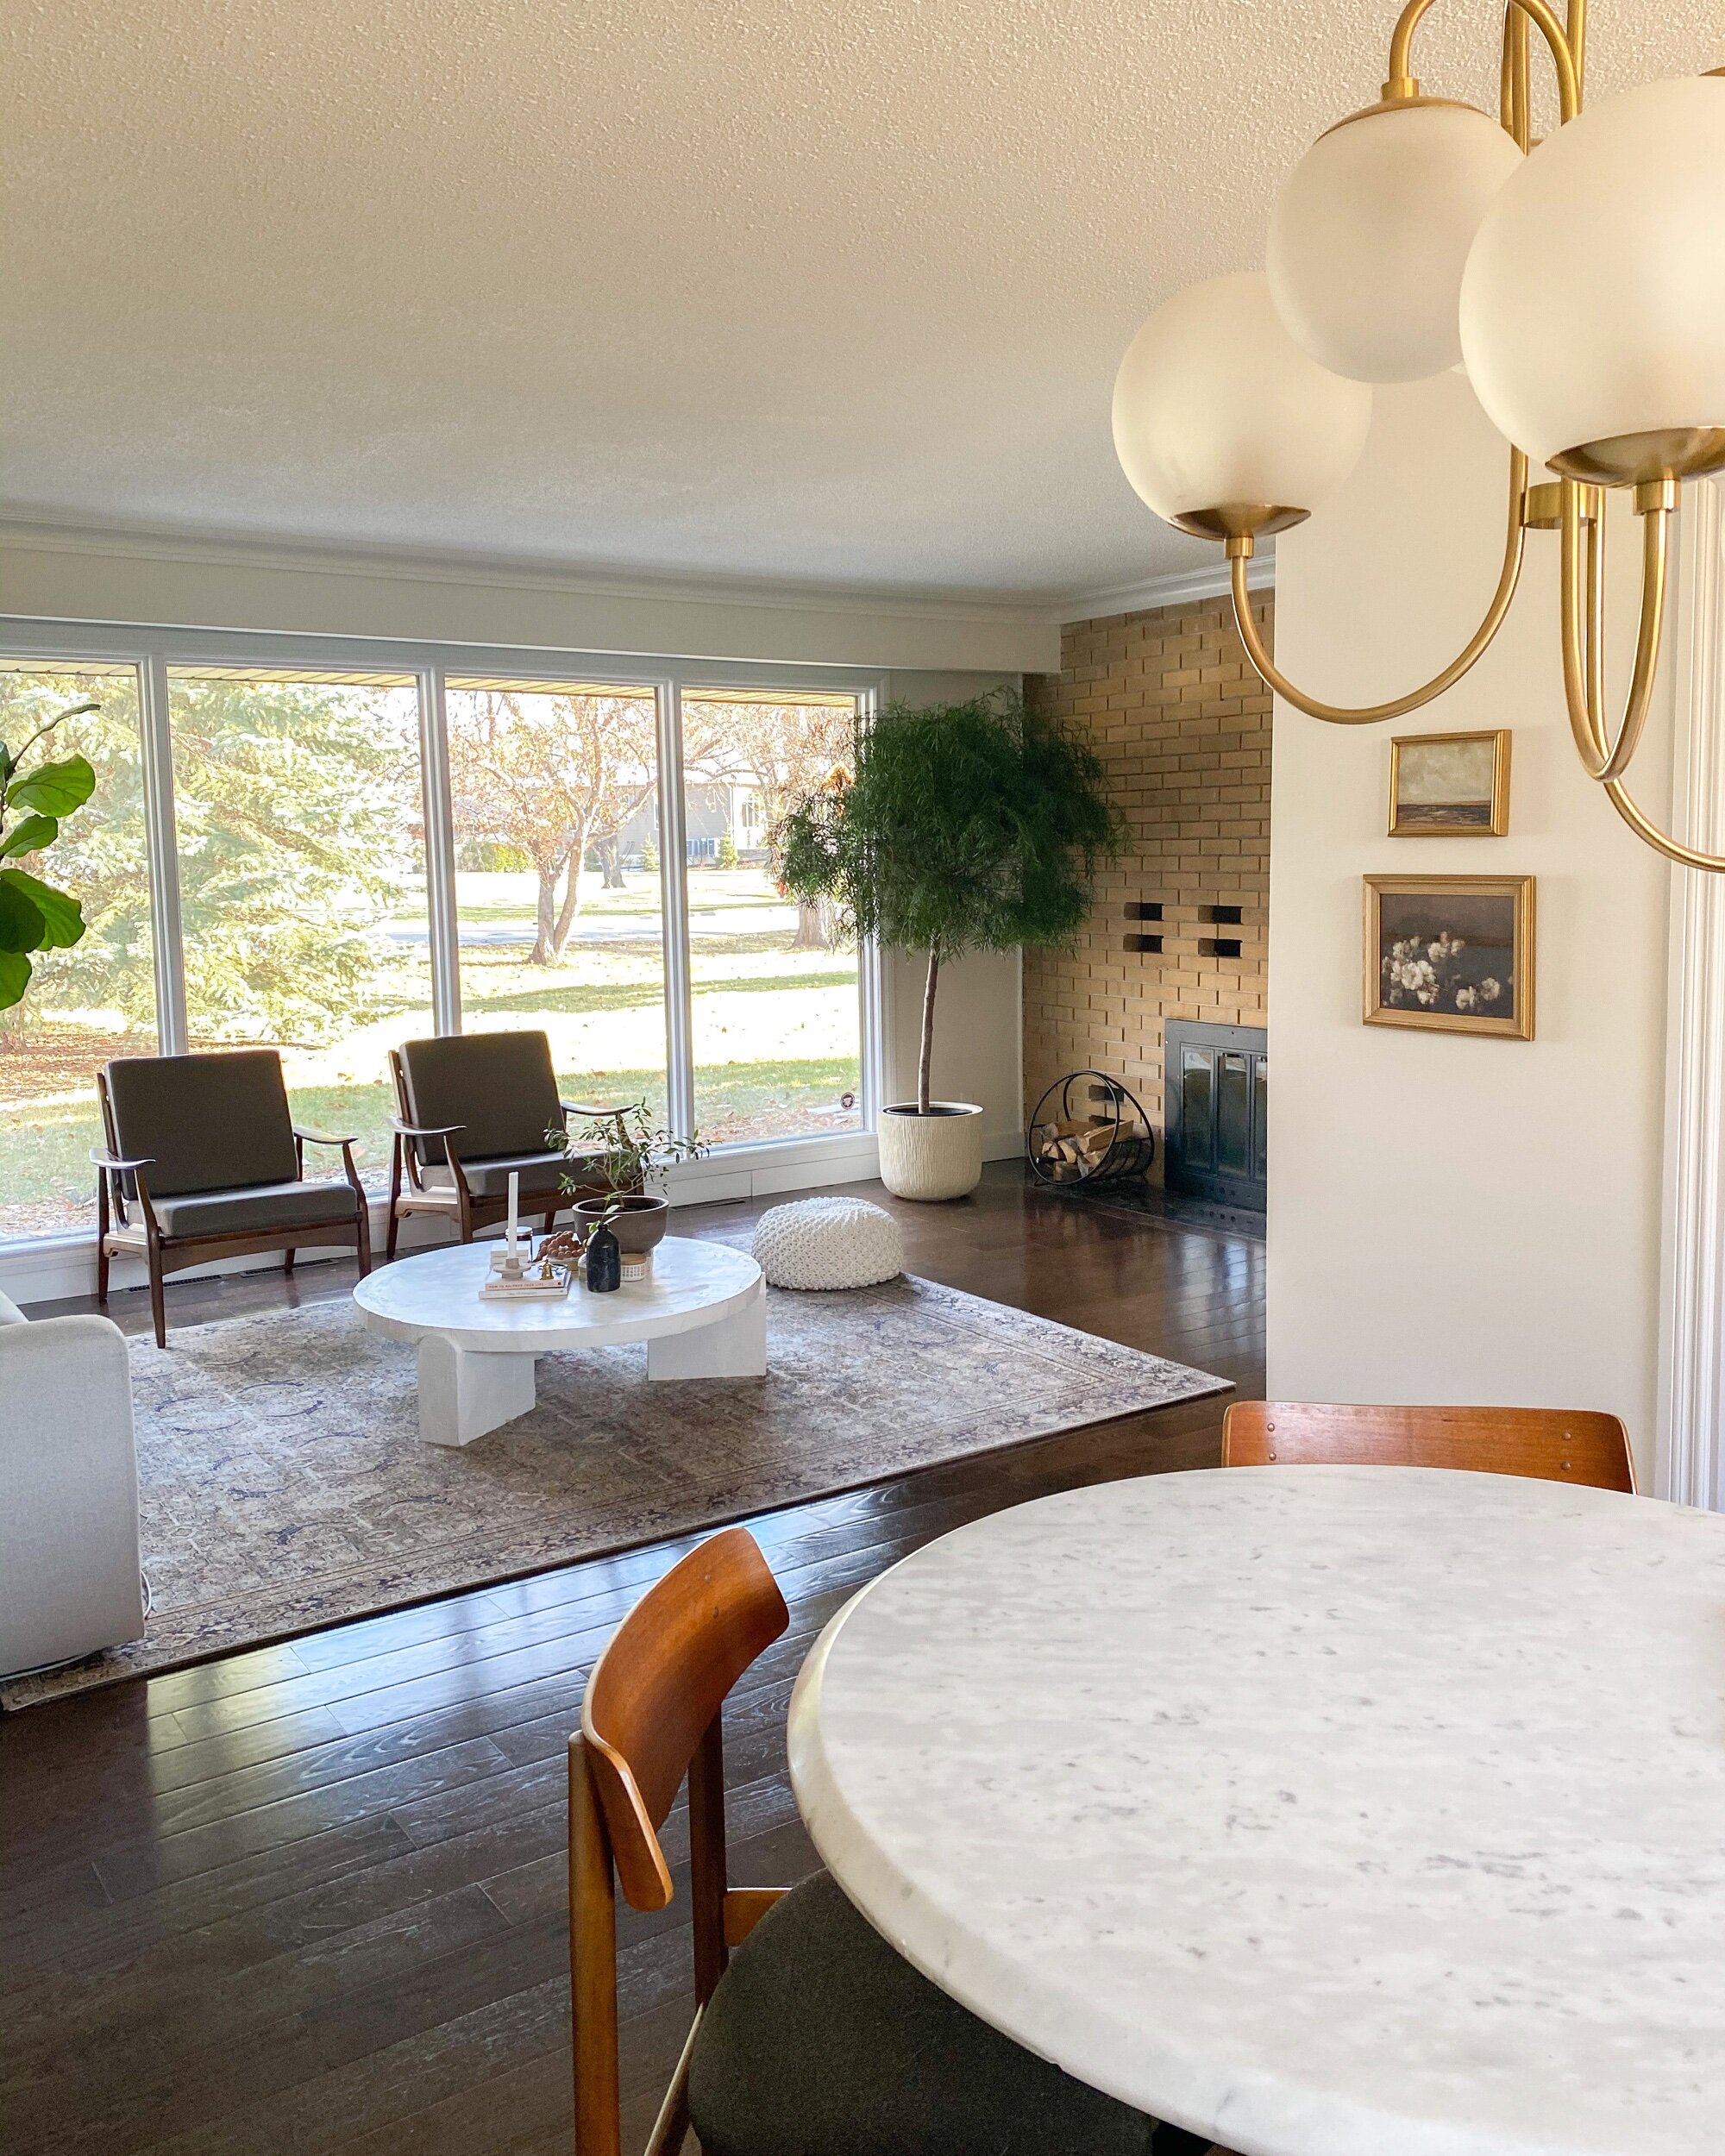
So we got inspired to build one to fill the space, and build one we did! And we had to share a tutorial with you all because it was so easy to build, can be customized to any size and a fun weekend project for anyone with a few tools!
Here’s what you need:
A sheet of 1/2” plywood - entire sheet is $28
Three 2”x4”s (8ft in length) - $6.40 each - $19.20
Screws to assemble the frame - on hand
Four table legs and attachment brackets - $65
Fabric - we used a table cloth from HomeSense - $25
2” foam cut to size - $45
Batting - $10
Staples (we use this staple gun) - on hand
Total cost = $192.20
1. Let’s not judge our messy garage (thank you!!). Okay so to build the bench, you can either get your plywood cut to your desired size at the hardware store, or cut it at home with a skill saw! Our plywood top measured 24”x46”, the perfect size for a nice wide bench that fit our space perfectly. Cut your 2x4’s to the same length as your plywood and attach with 1+3/4” screws.

2. Cut 3 cross braces to finish the width of the exterior frame and one for the centre as a support brace. Attach to the plywood with screws from the top side of the plywood, and also secure to the length wide pieces of the frame. The frame should feel really secure at this stage, we installed screws about every 8 inches.

3. Cut 2 pieces of 2x4 to fit on the inside of the frame, attach one first with screws, then the other and repeat on the other side. Attach the table leg top plate to the corners and screw in the legs. See how the table leg plates are slightly inset from the frame, it helps to conceal the metal and hide the bracket! It worked out perfectly and now the frame is done!

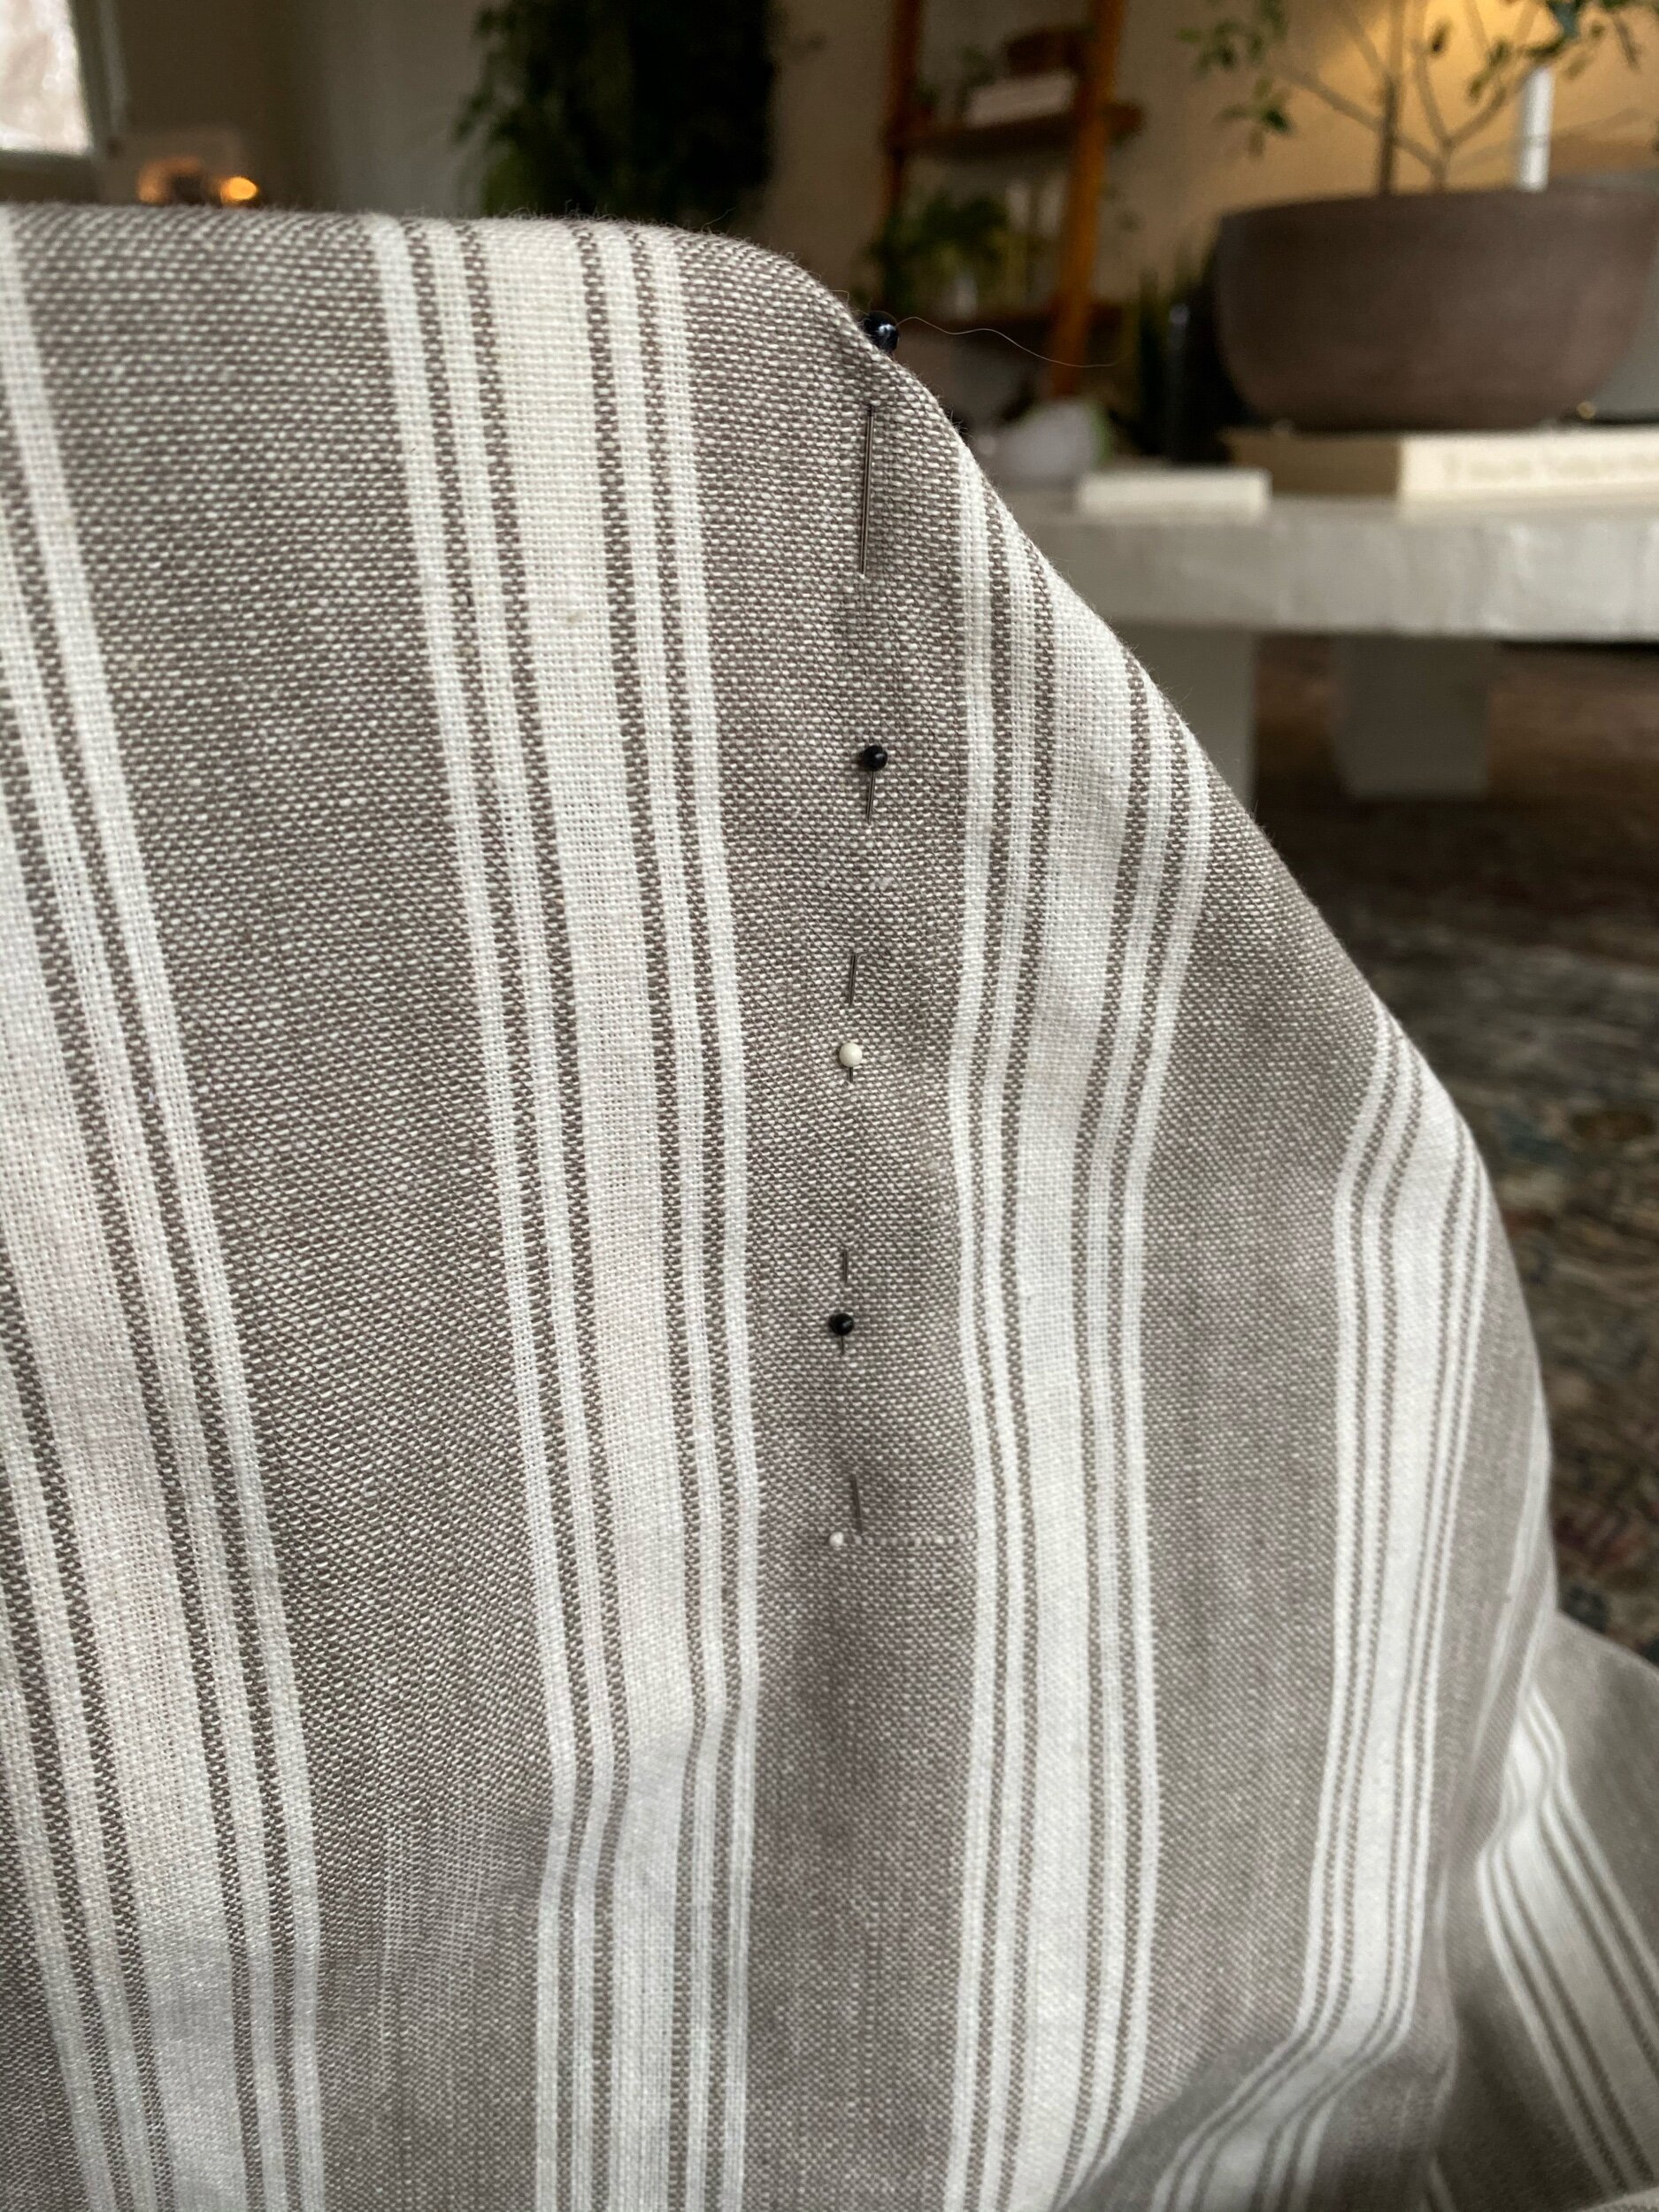
4. Okay so with sewing this bench, there are really only 4 seams to sew… but make sure you take your time lining up your pattern perfectly so that it will be super straight when it’s done, double check before you sew, it’ll be worth it! This is the cotton tablecloth that we got from HomeSense, it was $25 (this is something similar!), and we used some thread that we had on hand that was a perfect match!

5. Cut the foam to fit perfectly over your plywood and don’t use any batting during this next part, you’ll want to measure your fabric over the square corners of the foam. Make sure your fabric is steamed and crease free! Flip your fabric inside out and once your fabric is lined up, centred and square, measure your first corner! I just ran pins as close to the corner as possible in a straight line down, make sure you pin past where the frame ends so that that the seam runs under the frame.
ALSO - if you don’t have a sewing machine, you can fold the fabric over and secure it with staples. The only downside to this is that the corner’s won’t be as tight as if they were sewed, but it will still look great!
6. Take it off the frame, and sew it with a machine. Make sure to reverse at the beginning and end of the seam to knot the thread and cut any loose threads close to the seam. I added a second stitch on the outside of the pinned line, and cut the rest of the excess fabric off.

7. Once you flip the fabric inside out, place the stitched corner on the frame and if it looks like this, repeat on all four sides. If it looks all lumpy or crooked, send me a DM on instagram and I’ll try and help you (haha) or remeasure and try again to sew it as straight as possible!

8. Once all four corners are sewn, adhere the foam and batting to the frame with some spray adhesive. Place the fabric over the foam and batting on the bench, and steam the fabric once more before stapling. Using a staple gun (highly recommend this one), and staple the fabric on the bottom edge of the frame pieces all around. Make sure to pay attention to the pattern of your fabric and how tightly you pull the fabric to ensure it is straight from side to side.
9. And lastly stain the legs of your table if you want! We used this stain.
AND ENJOY!!!!

Such a quick project with a high end look, we honestly did not think it would look this good and we are pleasantly surprised! At less than $200 it is such a diy look for less and was such a fun project to work on this past weekend with Joel! We just want to make sure we are really, really ready to host people at our home once it is safe again!
