
all the details behind our exterior makeover!

The first time we saw our home, it was almost love at first sight. We completely fell in love with the floor plan, the amazing neighbourhood, the fireplace and those floor to ceiling windows (hubba hubba). The exterior… was something we knew we could work with, and to say it has come a long way is an understatement.
Just for a quick recap, this is what we started with:

This was definitely the largest renovation we have ever completed, it took us about 5 months and we are beyond thrilled with the results.
After pinning, oh so many black houses on pinterest I knew we needed to go dark with the exterior. It creates such an organic, neutral, moody look that this home was definitely craving.
The first step in getting the renovation started was to replace the old windows with new triple pane windows. We ordered our windows from Ecoline Windows and were able to customize them with black trim on the outside and white on the inside.

Cost saving tip - Instead of two casements per window, we switched to a single casement with a larger picture window. This created a modern look and saved $$$
We were very lucky that the floor to ceiling window on the main floor was already a triple pane window, so we were just able to paint the wooden frame black ourselves.

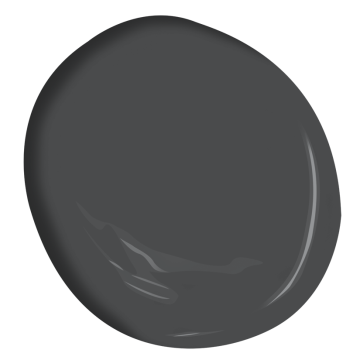
Once we had the windows completed, we had to pick our paint color. We were deciding between Benjamin Moore Wrought Iron and Iron Mountain. It’s tough to pick a black paint color because black paint will often have a blue undertone. We were really trying to avoid any blue tones, because it would just enhance the orange tone in the brick chimney. We chose Iron Mountain because it is a very very dark warm grey, that does read as almost black on our exterior and it complemented the preexisting brick very well!

For the painting, we brushed and rolled the aluminum siding with two coats of a dark tinted primer and then two coats of Iron Mountain. With help from my lovely in-laws we were able to complete the painting in about two weekends!
Now that the siding was painted, we were just counting down the days until our soffits, eavestroughs and fascia were re-done in black to match.


Having black soffits and eaves was definitely one of the final details in completing the look, it made our home look seamless.
So. Much. Better.
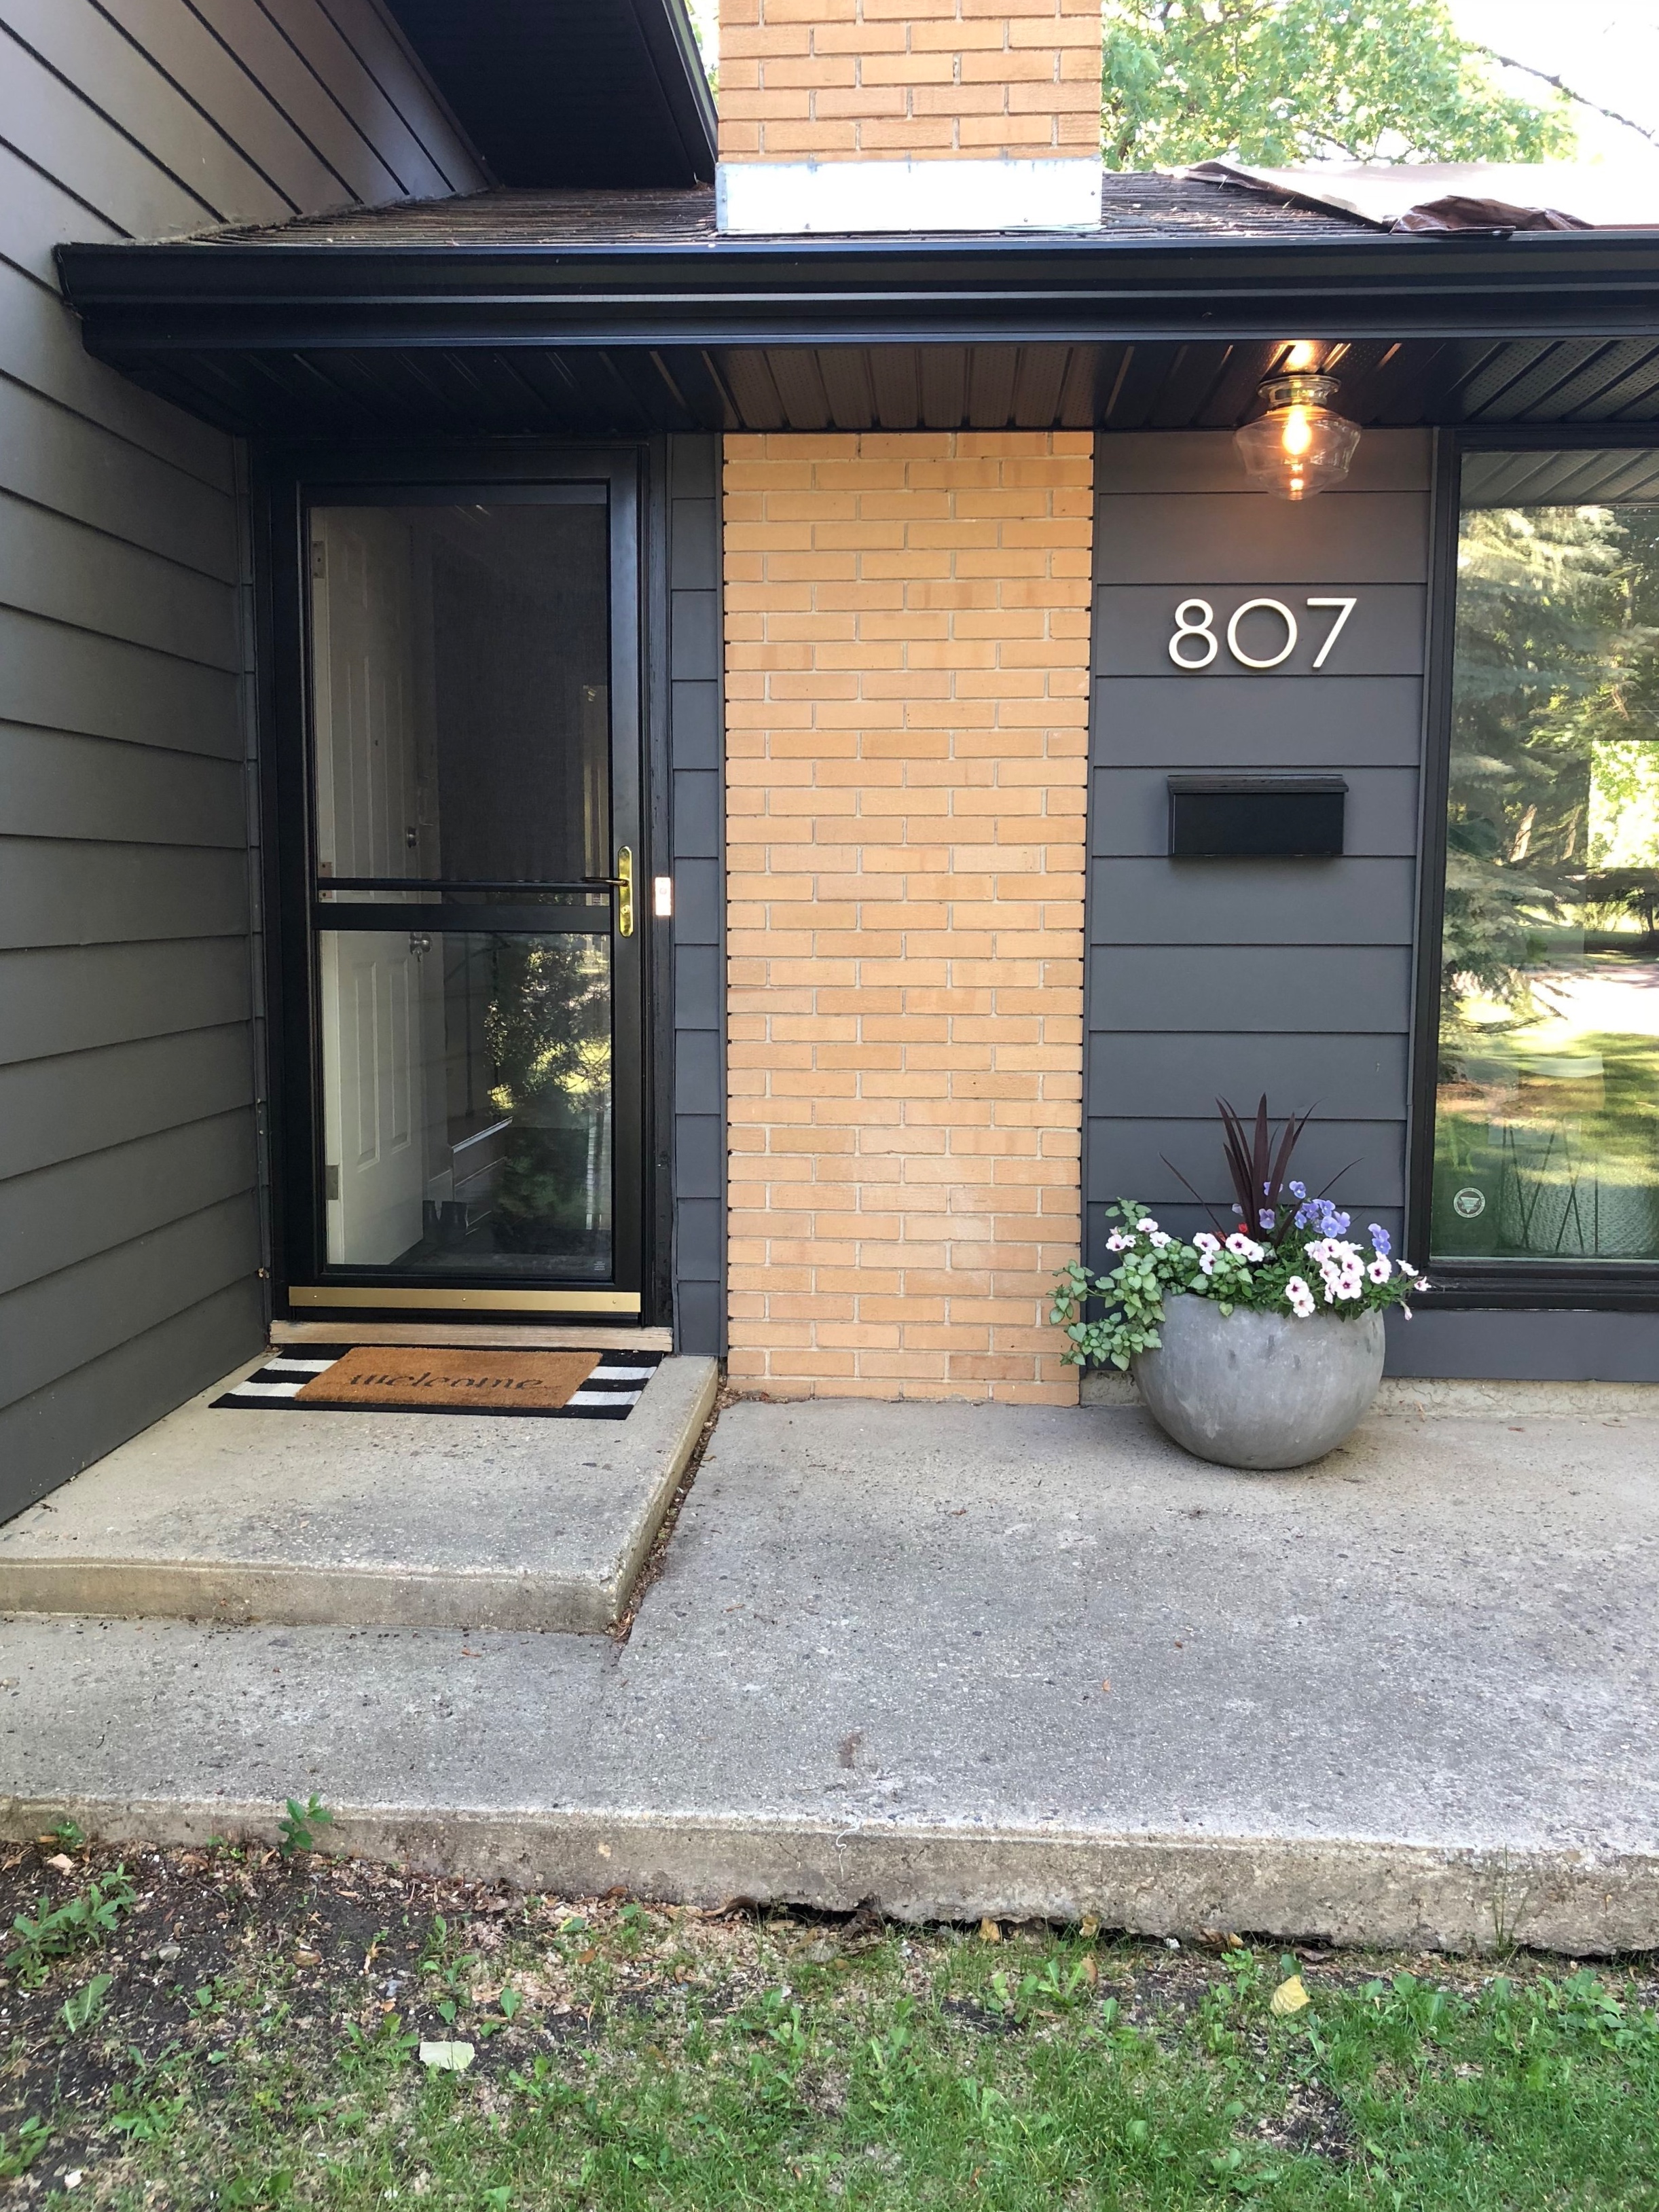
To add that little bit of sparkle to our home we added these brass modern house numbers, this adorable doorbell cover, and this unlaquered brass exterior light. We also installed a new black storm door because we love keeping our front door open pretty much all summer long.
Juuust as things were moving along peachy keen, our roof started leaking during a big storm. Our shingles looked pretty decent from the ground, but there were certain spots that had peeled up and were leaking into the attic. So, we had a tarp installed to prevent any interior damage and then had to wait to have our entire roof redone. Talk about an expensive buzz kill…
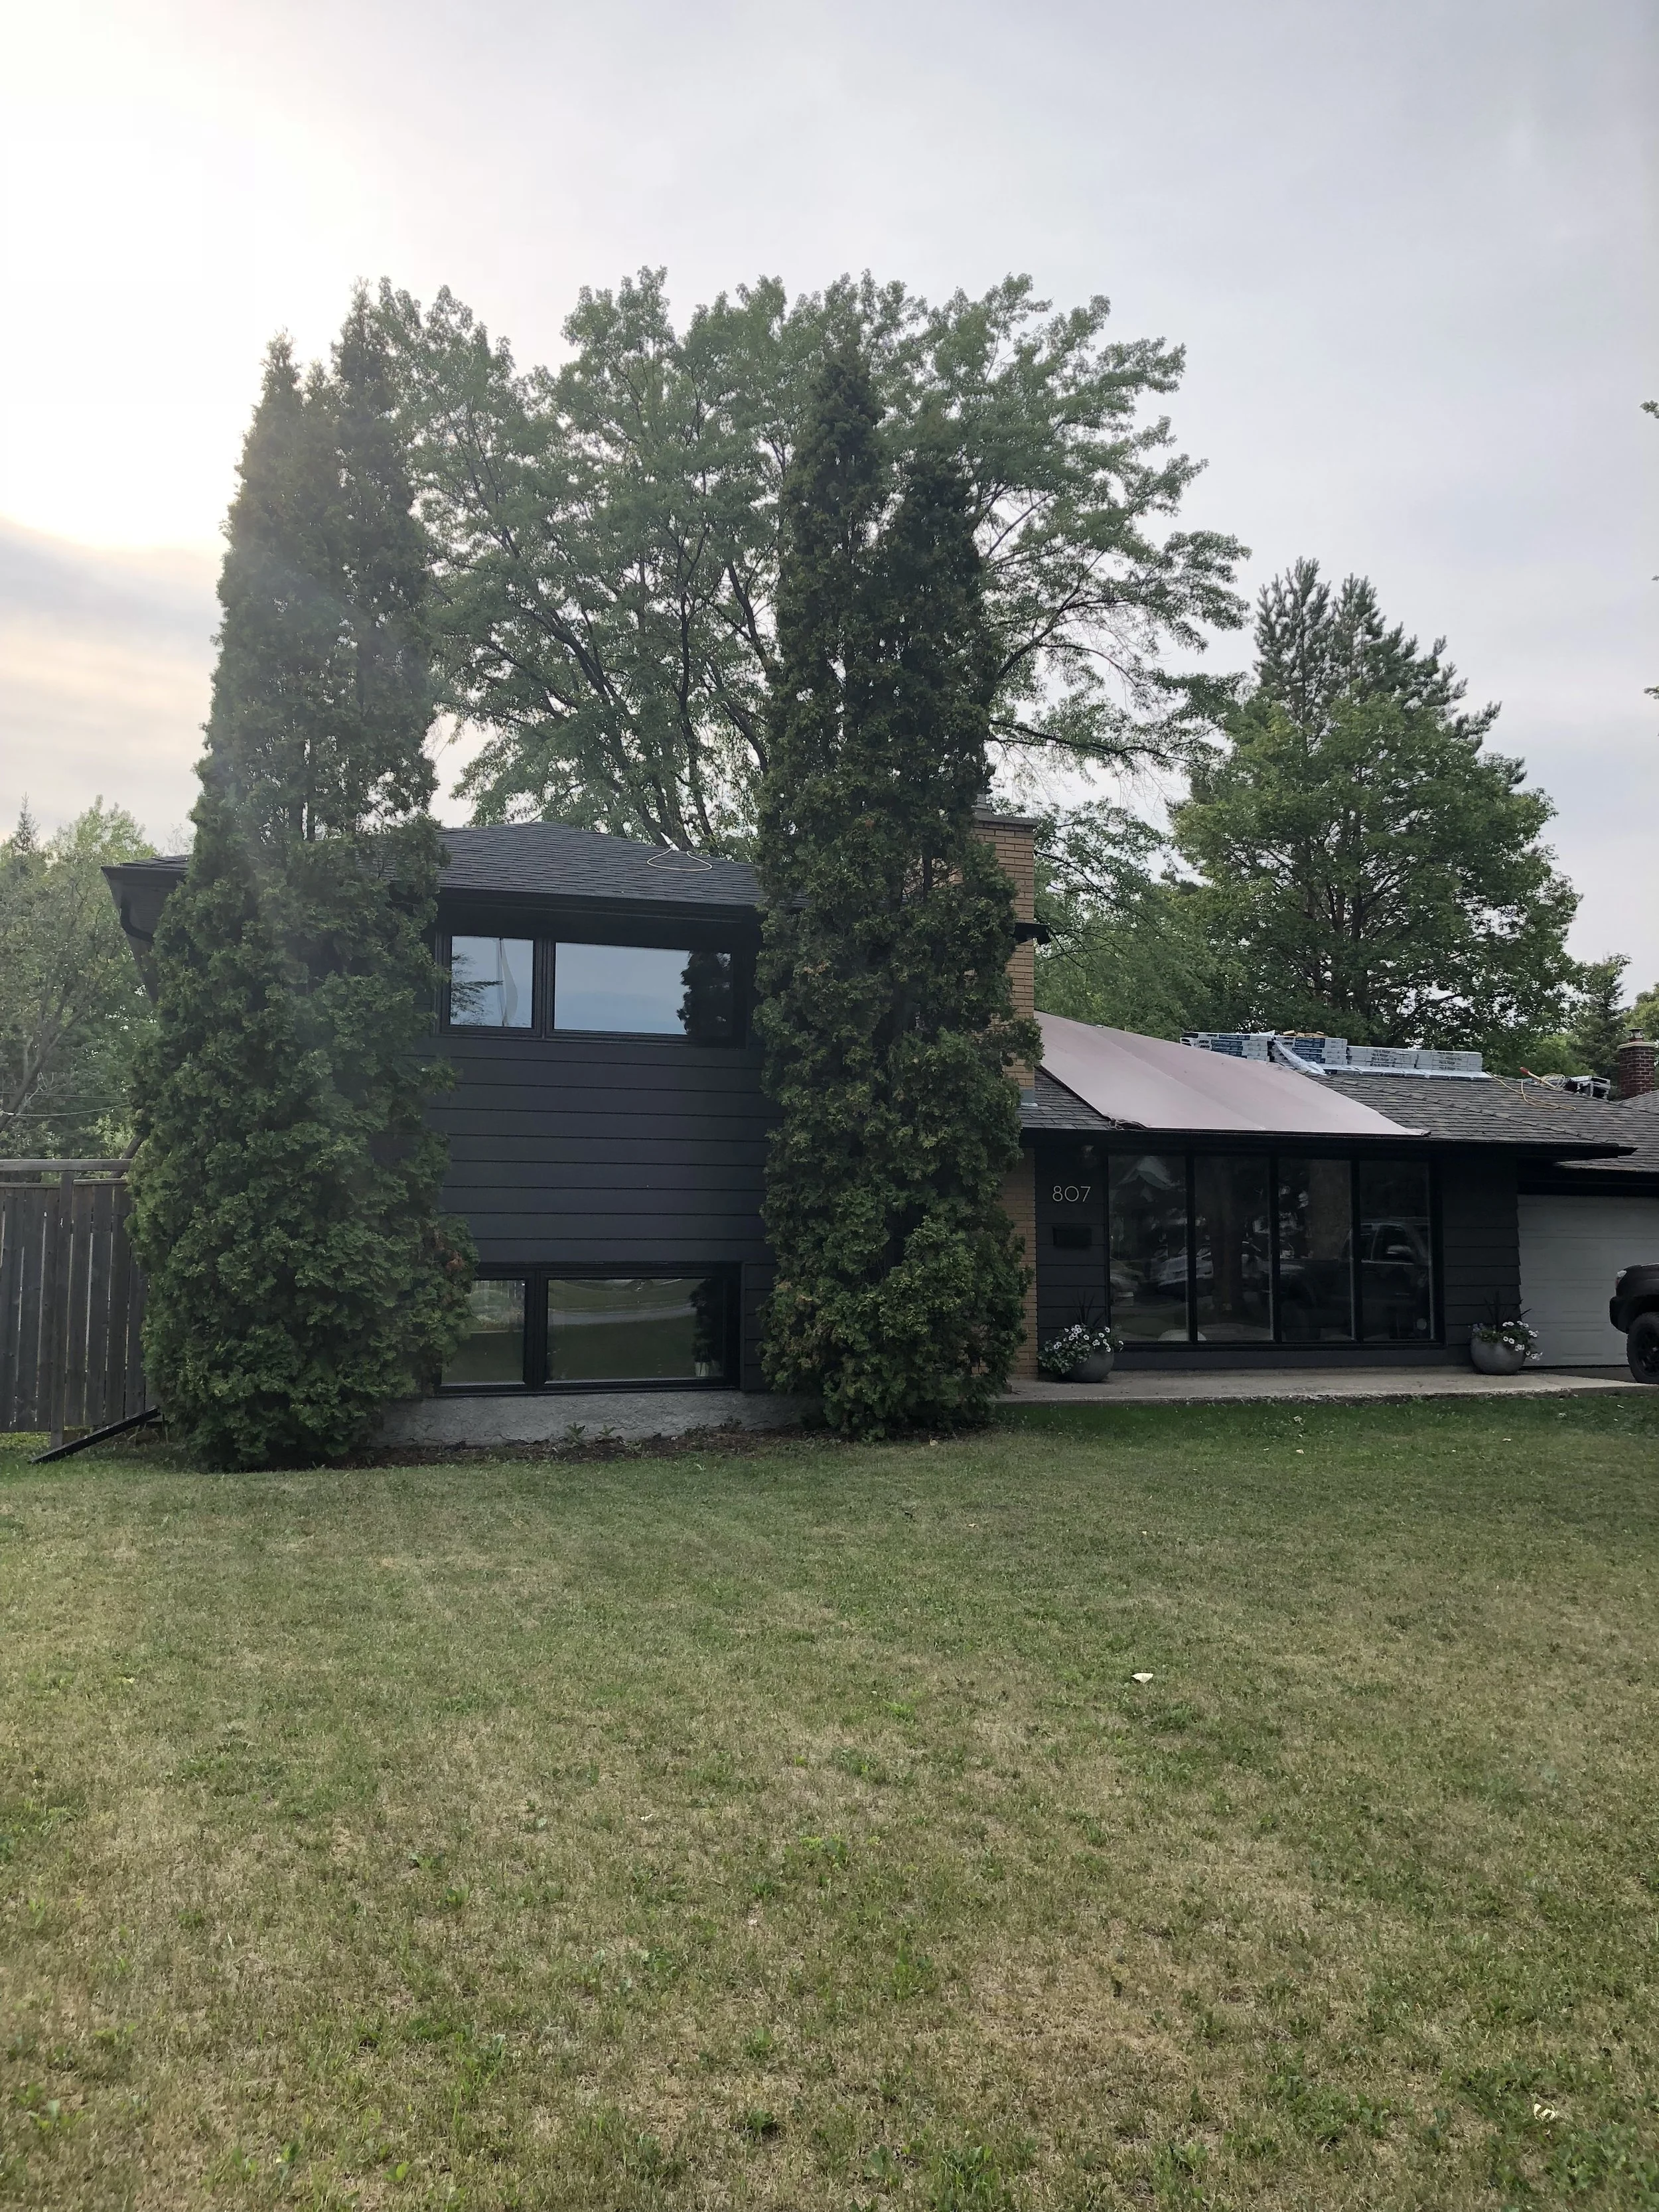
We chose to have our roof redone with IKO Cambridge Shingles in Dual Black. We were debating between other tricolour options, but keeping it simple and obviously black was the best decision for our home and we are so happy with the end result.

We love our home inside and out and are so happy we get to explore its full potential.

Throughout every season, it just keeps getting better!

We still have a few things left to do, including our front door and garage door that are both still white and untouched. We are in the works of getting those last few details nailed out so that our home exterior will be finally complete one day (and I can stop cropping them out of pictures).
If you have any suggestions for the doors, comment below and let me know what you think!